Skip to content

About pears

How to grow pears

Everything you need to know to grow productive pear trees at home, even in a modest garden or big patio pot.

Growing

4-6 years

Difficulty

Moderate

Cost

$$$$$$

A close photo of pears

Overview

Sunlight

At least 6-8 hours of direct sun per day in an open, sheltered position for strong blossom and fruiting.

Water

Regular, deep watering in the first years and during dry periods, keeping soil evenly moist but not waterlogged.

Temperature

Best growth in temperate climates with cool winters and mild to warm summers around 60-75°F (15-24°C).

Spacing

Plant standard trees 15-20 ft (4.5-6 m) apart and dwarf trees 8-12 ft (2.5-4 m) apart to allow good airflow and light.

Cultivation time

Expect the first proper harvest about 4-6 years after planting a young grafted tree, with heavier crops as the tree matures.

Required climate

Pears prefer a temperate climate with winter chill, full sun, and moist but free-draining soil, and will often tolerate slightly heavier soils than apples.
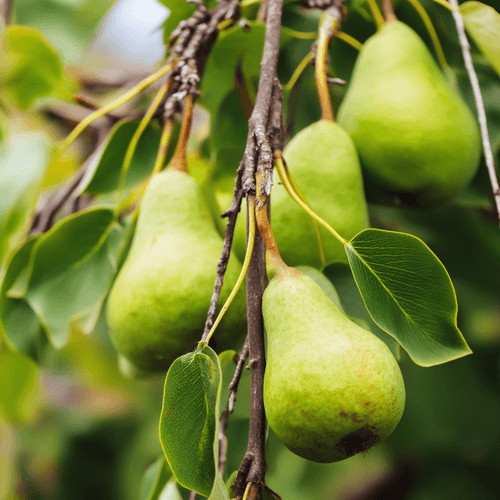
Plantation yield

A mature dwarf pear tree can yield many kilos of fruit each season, while larger trees can provide more than enough pears for fresh eating and preserving.

Pot cultivation

Grow a dwarf pear on a suitable rootstock in a very large container with rich, free-draining mix, full sun, regular watering and feeding, and careful pruning and support.

Growing requirements

What supplies do you need to grow pears ?

Section titled “What supplies do you need to grow ?”
  • Young grafted pear tree of a variety suited to your climate and chill hours
    Required
  • Loamy, well-drained soil or high-quality fruit tree compost enriched with organic matter
    Required
  • Balanced slow-release fertilizer for fruit trees, with good potassium levels for fruiting
    Required
  • Organic mulch (compost, bark, or straw) to conserve moisture and suppress weeds
    Required
  • Sturdy stake and soft ties to support newly planted or container-grown trees
    Optional
  • pH test kit to keep soil close to slightly acidic to neutral (around 6.0–7.0)
    Optional
  • Sharp pruning shears and loppers for shaping, training, and removing dead or diseased wood
    Optional
  • Pollination partner pear tree if your chosen variety is not fully self-fertile
    Optional
Planting

Plantation calendar

JAN
FEB
MAR
APR
MAY
JUN
JUL
AUG
SEP
OCT
NOV
DEC

Best time to plant

Still possible to plant

Not recommended

Planting pears outside

  • 1Choose a sunny, open but reasonably sheltered site with well-drained soil and space for the mature canopy or trained form.
  • 2Dig a planting hole about twice as wide as the root system, loosening soil at the base and sides and mixing in compost if needed.
  • 3Set the tree so the graft union sits a few inches above soil level and spread the roots naturally within the hole.
  • 4Backfill with the excavated soil, firming gently with your hands or feet to remove air pockets and stabilize the tree.
  • 5Water deeply after planting and form a shallow watering basin to direct moisture towards the root zone.
  • 6Mulch over the root area, keeping mulch away from direct contact with the trunk, and stake the tree if it is tall, windy, or being fan- or espalier-trained.

Pro tip: Plant pears when dormant in late winter or early spring, keep the graft above soil level, and, where possible, plant at least two compatible varieties nearby to improve pollination and yields.

Planting pears inside

  • 1Select a dwarf or patio pear variety on a suitable rootstock and a very large container with generous drainage holes.
  • 2Fill the pot with a free-draining, fertile fruit tree mix blended with compost and a little grit for structure.
  • 3Position the tree so the graft union stays above the compost surface and the root ball sits level in the container.
  • 4Backfill around the roots, firm the mix gently, and water thoroughly to settle everything and eliminate air pockets.
  • 5Place the container in full sun against a warm wall or fence and turn it occasionally so all sides receive good light.
  • 6Monitor moisture closely, especially in warm, windy weather, and renew the top layer of compost and mulch each year.

Pro tip: Container-grown pears depend on you for water, nutrients, and pollination, so keep the compost evenly moist, feed regularly, and make sure blossoms are accessible to bees.

Plant care

Watering

Water deeply and consistently, especially from flowering through early summer and again as fruits swell, allowing the surface to dry slightly between waterings but never letting the root zone dry out completely or sit in standing water.

Fertilizing

Feed in early spring with a balanced, slow-release fruit tree fertilizer and a mulch of compost, then lightly top up in late spring if growth or leaf color looks weak, avoiding heavy nitrogen applications that encourage lush shoots instead of blossom and fruit.

Pruning

Prune pears in late winter to maintain a balanced, open framework, remove dead, diseased, or crossing branches, and lightly thin congested spurs so light and air can reach the developing fruiting wood.

Harvesting

Time

Most pear varieties are ready from late summer into autumn, a few years after planting once trees begin bearing reliable crops.

Signs

Fruit changes from hard, bright green to a softer variety-specific color, lifts and twists off the spur easily when gently raised, and finishes ripening off the tree to a juicy, buttery texture.

Harvest pears on a dry day by lifting each fruit gently and twisting until it comes free with its stem attached, then handle carefully and ripen them indoors or in a cool, shaded place until they yield slightly to pressure near the stem and develop their full aroma.

Problems & solutions

Common issues when growing pears

Section titled “Common issues when growing ”

Pear scab

Dark, velvety spots and scabby patches on leaves and fruit, leading to cracking and misshapen pears.

Gather and destroy fallen leaves, choose resistant varieties where possible, prune to improve airflow, and use approved fungicides or organic sprays from bud break if scab is a recurring problem.

Fire blight

Blackened, scorched-looking shoots and blossoms that wilt and curve like a shepherd’s crook.

Prune out affected shoots well below visible damage during dry weather, disinfect tools between cuts, avoid high-nitrogen feeding that stimulates soft growth, and remove heavily infected trees where the disease cannot be controlled.

Pear rust

Bright orange spots on leaves with raised, blistered structures on the undersides later in the season.

Remove and destroy affected leaves, avoid planting junipers that host the fungus close to pear trees, and apply suitable fungicidal sprays at key times if rust regularly damages foliage.

Aphids and pear psylla

Clusters of small sap-sucking insects, sticky honeydew, sooty mold, and curled or distorted leaves.

Encourage natural predators like ladybirds, wash small infestations off with water, and use horticultural oil or insecticidal soap when populations become heavy to protect young shoots and reduce the risk of honeydew and mold.